Monday 29 November 2010

TV advert week

TV advert week

Tuesday –
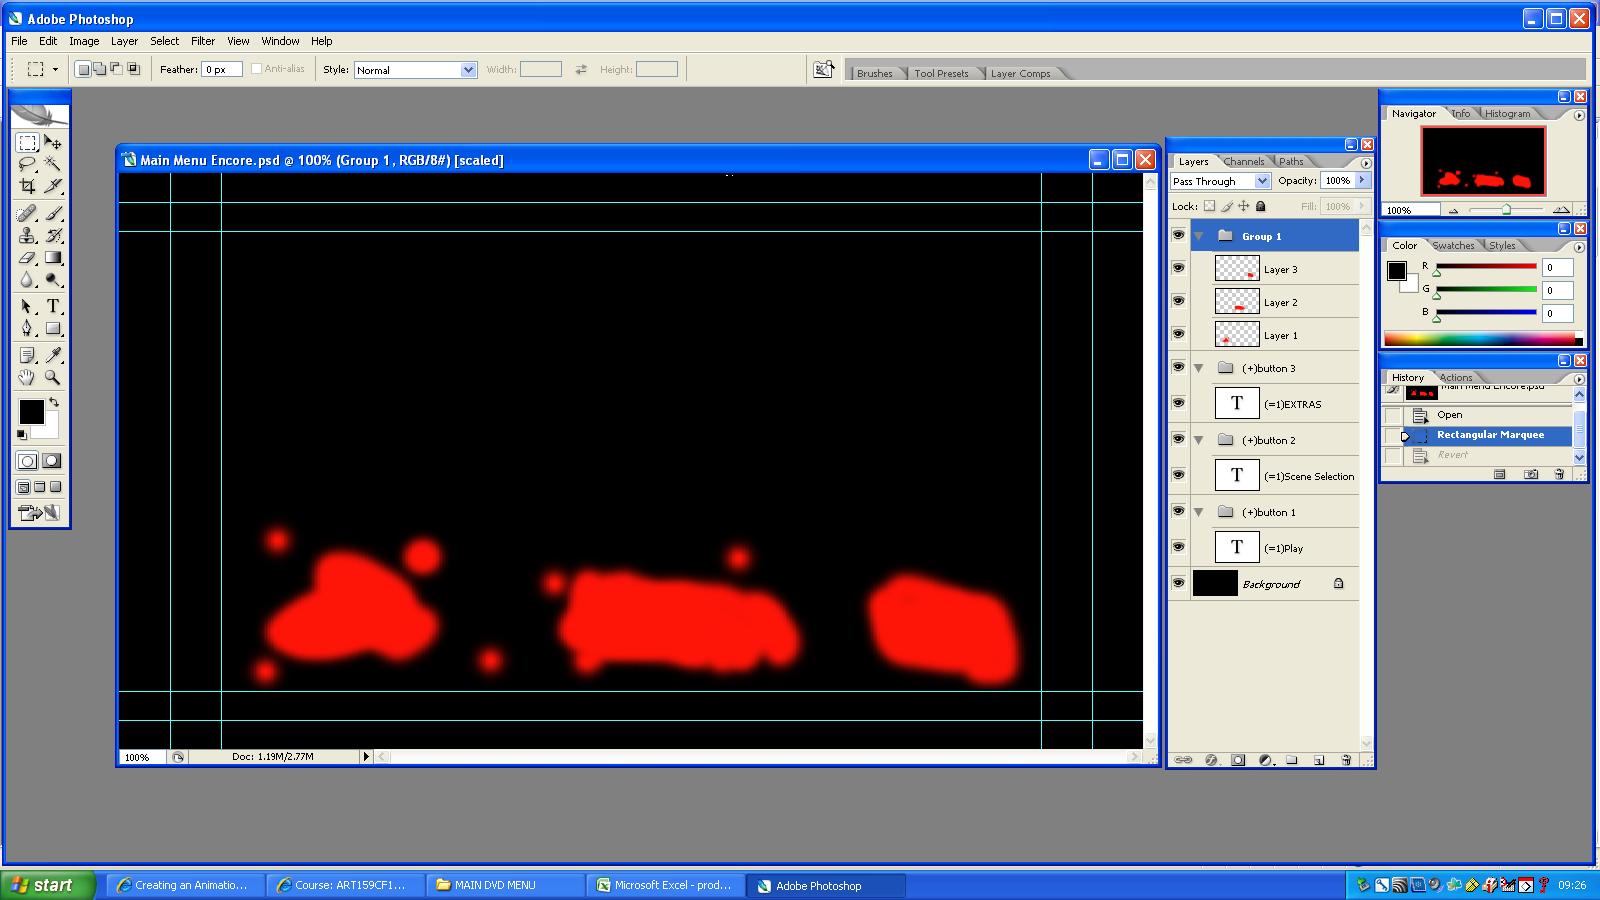
In Andy’s morning session, we were introduced to a new assignment by watching a documentary on TV adverts. We were given a sheet to fill out and complete. We had note down the advert and distinguish the reasons why that advert was banned.  In afternoon, we continued our DVD menus and I was linking everything up in Adobe encore.  

Wednesday -
In Andy’s morning session we had an hour where I looked back through my coursework and edited parts of it. After that we went to a presentation about safe drive, which was interesting but sad.  In the afternoon, I continued to complete my menus in encore and I managed to complete everything except the sound.  

Friday - In Friday’s session I was looking for some music tracks and I found two tracks which I’m going to use. These two tracks are from a classic horror movie called psycho.  I also continued to get to up to date with my blog.  In Simon’s lesson I was given review sheet and I went over some of the things which I need to improve on so I can get a better grade.  

Thursday 25 November 2010

Snatch Week

Tuesday –
In Andy’s morning session we watched Snatch and I enjoyed it a lot. It has some of my favourite actors, Brad pit and Jason Statham. In the afternoon I started to create my images for my DVD menu.  I learnt during that lesson on how to change the colour effects in Photoshop. So it looked more realistic.  I managed to finish off my images in Photoshop and I’m now ready to put it into Adobe Encore.  

Wednesday –
In Andy’s session in the morning I continued to create my DVD menus and add my images to it. In the afternoon I started to import my Photoshop files in encore and I started to bring everything together. However, I had a few problems with the animation; it wouldn’t work when I put it onto the slide so I had to wait for Simon on Friday.
Friday –

On Friday. In Andy’s morning session I tweaked my images so they look more professional and made sure they could be imported into encore without any problems.  In Simon’s afternoon session I was told that I hadn’t saved my file correctly. So I had to save it as .MOV file and then imported it into Adobe encore, so it could work. However, another problem occurred I didn’t know you couldn’t import a couple of animations and put them onto the menu. So I had to go back into Photoshop and move all the animations into one .MOV file.  I had to also create another file which was the freeze frame of my main menu after the animation. This allowed me now to navigate through my menus.  I encountered a problem with Adobe Encore where it kept debugging, so I had to edit the quality presets so it worked.  This seemed to resolve the problems sometimes, so I need to have another chat to Simon about the issue.

Friday 19 November 2010

Horror Music for DVD Menu

http://www.youtube.com/watch?v=hYPoDFil1r0&feature=related

http://www.youtube.com/watch?v=z8xxyj8qMHQ&feature=related

Generating MoodBoard Annotation

Techniques I used for Animation

Techniques I used for Animation.

Animation

I created my eye animation by keeping the eye in one place and in the next frame, I would move it to the side and then tween so when I go to play the eyes moves from side to side. If I were to make it better, I would add more frames to slow down the eye movement and make the animation longer. I would also add some affects to the eye to make it look more realistic.                                                                                   

For this animation, I had to use the opacity tool so that when it came to the next frame, I would add an extra blob. When I played this back, the flame would grow until the animation stops. Some of the things, I would do to improve the animation would be to adjust one of the frames because a part of the yellow is out of align.

For my main title, I decided to add animation.  For this animation, I decided to have my title flickering. I did this by changing the opacity of the title in the second frame to 0%.  After I did this, I duplicated the frames so it was longer.  If I were to make this animation better, I would slow it down by changing the frame delay rate to 0.5 seconds.

Tuesday 9 November 2010

Ghost Busters Week


Tuesday
In Andy’s morning session we watched Ghostbusters which was a really good film.
In Andy’s afternoon session we were given feedback while we got on with our work. I was finishing my mood board off.

Wednesday
In Andy’s lesson, I was creating some images in Photoshop for my DVD menu design.  In Harry's afternoon session, I was annotating my mood board and experimenting with images in Photoshop.
Friday
In Andy’s lesson, I continued to create more images for my DVD menu design. I was doing the scene selection.  I am continuing to collect more images and I am starting to make examples of my animation that I need for my DVD menu. 
In Simon’s lesson, I did an evaluation of what skills I have learnt so far on the course and I continued to make examples of my animations.

Little Miss Sunshine week

Tuesday
In Andy’s session I handed in my second part of digital image report then, we watched little Miss Sunshine. Little Miss Sunshine was really good and funny and also shows a horrible reality of how girls can become obsessive with the competition. 
In Andy’s afternoon session, I added some more things to my proposal so it was longer. For instance, I added a bit of information about the background of the movie and changed the movie budget slightly.
Wednesday
In Andy’s session I proposed my idea to him and  I felt it went very well even though I was nervous.  There were more things I could have said but I forgot to.
In Harry’s afternoon session he taught us to do animation in Photoshop, I loved this a lot because it was fun and creative.

District 9 Week


Tuesday
In Andy’s lesson we watched district 9, I liked this movie a lot because it is a fantasy sci-fi which is based like a game in the way the story is set. 
In the afternoon, Andy introduced to us the proposal. The proposal was about presenting my final DVD menu idea. We started making our presentations on PowerPoint or prezzie. I put my scanned image sketches up on the PowerPoint and I also looked for animations to show an example of what my DVD menu would look like.  We ended early in this session.  
Wednesday
In Andy’s lesson we continued to do workshop based work and I was making a new mood board for my DVD menu and continued my piece of work which was ‘understanding different Film genres’.  My mood board is based on the horror genre and I found images which would help me to create my DVD menu.
In Harry’s lesson we continued with the encore and I completed all 9 exercises. I found encore quite easy.  Harry also taught us how to make flash buttons in Photoshop and import them to encore.  Again this is quite simple.
Friday
In Andy’s lesson I was finishing my Digital Image report off so I could hand it in but I needed a bit more time, so I’m handing it on Tuesday.  I spent the whole lesson finishing it off in class.
In Simon’s lesson I started to finish off my proposal for Tuesday.  I also started to finalise my ideas, so that I knew what I was going to say in the proposal.

Monday 8 November 2010

Generating Images

New Picture in Photoshop

Original Picture

Thursday 14 October 2010

5th - 8th October

Tuesday 5th October 11:15- 1:15
In Andy’s lesson we watched zombie land and I liked the movie a lot. The DVD menu was very interesting because they had used a lot of animation.


2:15 – 5:15 
In this session, I continued to research my DVD menu and decided to do a mood board on the genre horror. I have also decided to call my movie ‘Unspeakable Truth’. Later on in this session I started to draw sketches of my ideas on paper.

Wednesday 
9:15- 11:15
In Andy’s lesson I continued to get more images for my mood board.  I also started to write up my report on digital images.

12:15- 1:15
In Jame’s lesson he was getting us to practise our debating skills with many questions like ‘should all students get EMA?’ I found this activity very helpful because it boosted my confidence.
1:30 – 5:30
In Harry’s lesson he showed us a tutorial on how to use some of the features of encore. I found this software fairly straight forward and I’m looking forward to Harry showing us more to do with encore.  He showed us how to link up a file.
Friday
9:15 until 1:15
In Andy’s lesson it was workshop based again and I continued to work on my digital image report and do more research on it.  I found some useful websites which helped me to understand more about digital images.
In Simon’s lesson, I continued on my document which was ‘researching different genres’.  I did this so that I can show my understanding of what that DVD menu would need to complete its genre?
I also scanned my sketches in so I could post them in my Blog.

Sunday 10 October 2010

Tuesday 28th September

 Tuesday.  11:15 – 1:15


In Andy’s lesson, we watched a documentary about a guy called ‘Troy Duffy’ who was given an opportunity in Hollywood become a famous director but instead he threw it all away because of his arrogance to rebel and have fun. The interesting thing about this film is that he messed up big time but he was still given more opportunities and he messed them up. His film was only released in one theatre for a week as a result. His film is actually supposed to be ok.  I did some research and he started filming again in 2009 for the Boondocks Saints 2. On YouTube he has behind the scenes for each day of the filming for Boondocks Saints 2.

http://www.youtube.com/user/realboondocksaints#p/u


 2:15- 5:15

In Andy’s lesson, Andy introduced us to a new topic about digital media. We have to write an article on digital graphics technology for an online digital graphics art e-zine.research about the different compression methods for files types and which file format is best for its purpose.
Here is the grading criterion;

Friday 8 October 2010

3 Ideas sketches


Here are two of my sketches and I will get a third done for this weekend. I will problaly choose horror as my genre for my DVD Menu design.

Friday 1 October 2010

31st Friday

Friday


9:15 - 11:15

In Andy's lesson we did a digital workshop lesson, so we could get on with anything we were behind in. I needed to finish my film poster so I finished that and printed it off.  I had to change the font text of my poster because it was too western. I changed it to a typewriters text.  I got it off a website called http://www.dafont.com/ . I got rid of the dragons because I wasn’t using the right sort of iconography for my genre of film.

I had to also balance out the film poster with the rule of thirds. I did this by enlarging the gangster icon and the door. I also moved both images to the left so that it wasn’t slap bang in the middle.  After, I placed the title on the right. To make my poster look visually a bit better I added lot’s of blood and gore.

11:15- 1:15

In Simon’s lesson we had to copy our film poster work to a student external hard drive and print an A4 copy of it in 150 resolutions.  Once I had finished that, I started researching different Genres of films for my DVD front menu.

29th Wednesday

9:15- 11:15

We continued researching the different file formats. I printed out a number of webpage’s on a document and then I annotated them. I found these websites quite helpful because they were very detailed.  On top of this I continued to write my blog out.


12:15 - 1:15 - Jame's lesson

In James lesson, we told about motivation and how motivation can influence our lives. This can make us successful and achieve targets. He gave a pack of cards which we had separate them into groups which is 'motivational group' and the 'lazy' group'.


1:15 - 5:15 - Harry's lesson

In Harry lesson, we recapped on the main key things that will help us to make our blog good and our film poster good.    We had to find three things, which we felt we had knowledge of and would help us to complete assignments, and to blog. 
Three things to consider blogging throughout the two years on the course;
1.       What I have learnt from class and how that can help me in future projects.
2.       Additional research (website links, pictures and books) which will help me and other students.
3.       How am I progressing and how I can improve to make my tasks easier. 
Three useful tools on Photoshop;
1.       Magic Wand Tool to highlight an object and move it to another canvas.
2.       Magnetic lasso tool  to  grab a section of the texture or object and  copy it to another canvas
3.       Blending options for text, which can give the text an effect.
Three things to consider for my film poster;
1.       Rule of thirds is important because you have to make sure that the focus is not in the middle and that the rest of the poster looks visually good.
2.       I need to add the right Iconography to my poster so that my poster is themed to a genre.
3.       I also need to leave space for my focus points otherwise; I will not be able to have focus points, which the film is aimed at.  

Wednesday 29 September 2010

Research for Digital images

Key facts to include in article;
• File types TIF, JPG , GIF ,PSD
• PSD - is a file format which is created by editing software such as Photoshop, Corel Photo paint, Paint shop pro and Photo impact.
• JPG has the highest quality however, it can take up a lot of space. If you try to compress it, it will reduce the pixels and this will reduce the quality of the image.
• GIF is most common for graphic images. GIF contains no printing dpi information. GIF is out of date for 24-bit photos.
• TIF – is very good for compression and none of the quality is lost. In addition, it is a very small file. However, it is not suitable for 24-bit colour images.
• May include other facts if it is relevant.

• Bitmap s is made up of pixels. Bitmaps are very good for the quality although if they are scaled up, the edges become jagged up losing its quality.

• Vector Images are made up of paths and lines. There is very little quality, but whatever the size it always keeps its quality.

• Bitmaps are best for photographs and Images.

• Graphics is best for vector format are page layout type, line art or illustrations.


File Format Compressions

• Most file formats can be compressed up to 10% - 40% and can recover to the original state.
• The only file format, which can’t recover to its original state, is JPG because it reduces the amount of pixels therefore this will change the quality but will also be permanent change.

Tuesday 28 September 2010

Blog update (21st, 22nd and 24th)

26th September

21st - Tuesday
-          11:15 – 1:15  
In Andy’s session we watched a film called Crash and I found this movie very interesting and moving. This was because this film was structured on many racial family backgrounds in North America. This showed racial discrimination and how racial groups can treat other racial groups so bad.  This film was mainly focused on how white people treat most there racial groups really badly.  For instance, a police officer searched a Buddhist’s wife, but used it as an excuse to grope her.  The Buddhist was put in a very difficult position to act or let it happen. There were many other different scenarios in this film where families from other cultures were getting hurt.  This showed the amount of discrimination which harms families and how their cultural views are ridiculed and mocked.

-           2:15 – 5:15
In Andy’s later session, we wrote up part 2 of the essay.  The essay was about explaining what region codes are, authoring DVD menus and different sound formats. It was great to have time to do this in class.

22nd - Wednesday
9:15- 11:15
In Andy’s session we continued to write up our part 2 of the essay.  Andy also explains the correct format of submitting your work. I found this useful as it will help me in the future.
11:15- 12:15
After Andy’s lesson we had a tutor session where we did a team exercise which I really enjoyed. We were put into groups and we were given an egg with materials and we had to try to design something which would stop it from cracking when it fell.
1:15- 5:15
In Harry’s lesson, Harry showed us a Photoshop tutorial of many different tools, I found this helpful because it showed me some new tools which will be good to make my media product stand out and look a lot better. After he showed us a tutorial I went away and scanned my mood board in so I could edit it and make it look really good.

24th - Friday

9:15 - 11:15
In Andy’s lesson we had to do a peer assessment of someone else’s work. I found this very helpful because the person who marked mine and gave me useful feedback where I could go away and improve on it. I continued to write up the improved version for the rest of the lesson.


11:15 - 1:15
In Simon’s lesson, we showed us how to layer things properly and I found this very helpful because I can now change one object at a time without having to change the whole thing. For the rest lesson, I annotated my mood board.

Sunday 19 September 2010

Sunday 19th September- Film posters

A good website which has lot's of examples of film posters

http://www.allposters.com/-st/Movie-Posters_c101_.htm

Friday 17th September 9:15 - 1:15

Today in Andy's session we looked at the Top 100 most visited websites and this was quite interesting as some of the websites weren't as popular as you would think. Also we shared general additional websites amongst the class which will be helpful for me in the future. The most useful website which was shared by a student was;
http://www.videocopilot.net/tutorials/

As part of my research from Andy's lesson I decided to find some more useful websites which will help with designing my DVD menu and designing my film poster.

Here are some websites which I found;

http://www.pslover.com/

http://www.tutorial9.net/category/photoshop/


In Simon's session I explored different ways of using Photoshop to add special effects and make my mood board look more stylish. To help me to do this I went on the internet to find some tutorials which would help me produce better work. I also used a media book called  .......   to find some interesting texts and images, to help me design my film poster.  Here are some images which I edited in Photoshop which I have tagged to this post;


Wednesday 15 September 2010

Skills Profile

I have used Photoshop and I do know how to use some of the tools. I have used it in the past for graphics and arts. I have found this software very  useful because it has nice effects and tools which I added to my work.

Some other software which I have used is paint and 2d design. I used 2d design to vectorise my images so I could change parts of images colour.  

I have used Nero for DVD menus but I  don’t have a good knowledge of Nero.  

Other software I have used  are Macros in excel and html in web design.

Thursday 9 September 2010

Opinion on Grown-Ups

I really enjoyed’ Grown Ups’. I thought it would be a cheap comedy, but it wasn’t and it came across as a fun film with clever jokes. It looked like a family film for most ages from seeing the trailer, but it was actually quite crude and had some jokes which only would be suitable for an older audience. I found this quite interesting because this movie can be seen by different audiences. It might appeal to an adult family audience because it’s a dark, American comedy. Another type of audience attracted to this film is the younger generation between the ages of 14-20. They would be interested to go to see this film for the amusement of the typical crude jokes included. The actor Adam Sandler, who is part of the cast for ‘Grown-Ups’ , has acted in a lot of crude and dark comedy films such as ‘Happy Gilmore’ and ‘Water Boy’. Some of the viewing audience who watched the trailer may have already guessed that’s it a dark comedy, because Adam Sandler is involved in the film. Overall, from seeing the movie, it’s really a movie for teenagers who like films with crude comedy and also for an adult audience who enjoy clever jokes.


http://www.youtube.com/watch?v=OZB44Ea1A0k